Tuesday, April 25, 2017

Away Today - Wednesday April 26th

Hi All! 

Sorry I am away today! Complete the following :)!

1. Stop motion - LAST ABSOLUTE day to get images! ACT NOW! You are responsible for your own learning- use your time wisely! You can do this in one period!

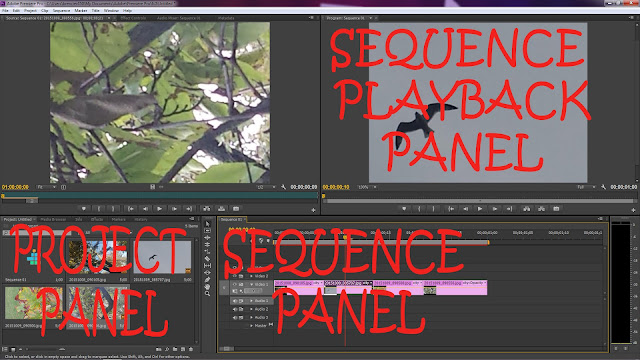
2. Read through tutorials that were posted about Premiere Pro.

3. Continue work on stop motion in Premiere Pro (or wait for me tomorrow and work on step 4)

4. Download stock video and create your own mash up in Premiere Pro using the tutorials that were posted (i.e. cutting and rearranging clips, adding effects, adding titles etc)


Adobe Premiere Pro Tutorial #7: Using a Green Screen

Adobe Premiere Pro Tutorial #7: Using a Green Screen

START BY ADDING YOUR TWO SEQUENCES TO THE TIMELINE IN THE APPROPRIATE TIMINGS. YOUR GREEN SCREEN FOOTAGE SHOULD BE IN VIDEO CHANNEL 2, WITH THE BACKGROUND ON CHANNEL 1.

premiere-importing
Add an Auto-contrast effect to your green screen video to enhance the background separation (type it into the effect browser to save searching around for it); use a Crop effect if your green screen doesn’t cover the entirety of your background.

Finally, add an Ultra-key effect – this is where the magic happens – and open up the effects controls in the top left.
premiere-chroma-key-settings
Use the eye-dropper to select your background color. BOOM. If the effect isn’t good enough, try increasing the Pedestal value found under Matte Generation.

Adobe Premiere Pro Tutorial #5: Adjusting the Duration of Each Frame and Ripple Delete

Adobe Premiere Pro Tutorial #5: Adjusting the Duration of Each Frame and Ripple Delete

Your task: Adjust the duration of all your frames at once and use Ripple Delete to bunch all frames together. SAVING YOU TIME!

You can adjust the duration of each frame one by one manually BUT if you would like to adjust them all at the same time instead of one-by-one follow these simple steps:
1. Click and drag the mouse over all your frames in the Sequence Panel so they are all selected.
2. Right click and select Speed/Duration from the drop down menu
3. A new window will come up called Speed/Duration.
4. Change the duration to 00:00:00:20 to make 3 frames fit in each second.

Ripple Delete
Now that you have all the frames adjusted to the right time the will be spaced out along the sequence track. In order to bring them all side-by-side you can use "Ripple Delete". Using the cursor, right click on the space between each frame and click "Ripple Delete" to remove that time in between.

Adobe Premiere Pro Tutorial #3: Making Transitions and Adding a Title Frame

Adobe Premiere Pro Tutorial #3: Making Transitions and Adding a Title Frame

Adobe Premiere Pro Tutorial #3: Adding Effects and Titles

Your task: Make transitions between frames smooth and learn how to add a title frame to your project.

Video Effects
1. Select the Project Panel, make sure it has the orange border around it.
2. Click on the tab "Effects"
3. Click on the folder "Video Transitions"
4. Click on any of the folder to find different types of transitions.
5. Drag and drop the transitions onto your Sequence Panel in Video 1, on top of the frame you want to use the transition on.
6. The transitions work really well transitioning from one frame to the next or transitioning from one scene to the next.
7.  Add 8 transitions, one on both ends of each frame for smooth viewing. It may help to zoom in again to see precisely where you are dropping each transition.

Titles
1. On the main toolbar click Title> New Title> Choose Default Still, Roll or Crawl


2. The New Title Window will pop up and you can name your title and hit okay.
3. The Title Window will pop up, this is where you change the look of the font, type the title, center the text etc. Many of the functions are the same as the type tool in Adobe Photoshop.

4. Play around with creating a unique title design: play with the size, shadow, fill, background, direction etc. 
5. When you are done creating your title, close the Title Window and the title will appear in the Project Panel with your other media.
6. Click and drag the title to the Sequence Panel, Video 2 bar. this way it will overlap your other frames.  Move it to the beginning of your sequence.  
7. Add an end title now.

Adobe Premiere Pro Tutorial #2: Adjusting the Timebar

Adobe Premiere Pro Tutorial #2: Adjusting the Timebar

Adobe Premiere Pro Tutorial #2: Time Bar

Your task: Learn about the Time Bar. Set up length of video and playback video.

1. The Sequence Panel is where you will edit video, shorten frame times, create Titles, etc.  Click on it to activate it, there should be an orange border around it after clicking.


2. From the previous tutorial, you now have 4 photos (also called frames) on the Video 1 Bar in the Sequence Panel. Make sure they are side by side, not overlapping and with no space between them. Like this:


3. See how time is displayed: time shows as 00;00;00;00, which is hours;minutes;seconds;milliseconds. This is very important. Shorten the grey bar at the top to 1 second (00;00;01;00). You may need to zoom in or out to see such a short time.


4. Now shorten each frame to be about a quarter of a second long each. As you scroll over top of the ends of each frame a red arrow will display. Once that shows click and hold to drag the frame length. 


5. Move the Current Time Indicator (CTI) to the beginning of your footage. Hit the Spacebar on your keyboard to view the video in the Sequence Playback Panel. Hitting Spacebar again also pauses the playback.


*TIP* Are your photos too big in the Sequence Playback Panel? Is the full photo not displaying? To fix this, double click the photo in the Sequence Playback Panel, then drag it down until you can see a corner of it. Click on the corner of the photo and drag it to become a smaller size. Move the photo until it fits in the Sequence Playback screen.

Adobe Premiere Pro Tutorial #1: New Projects, Panels and Importing Media

Adobe Premiere Pro Tutorial #1: New Projects, Panels and Importing Media

Adobe Premiere Pro Tutorial #1: New Projects, Panel IDs and Importing Media

Your task: Learn how to create a new project and import media (can be video, photos, images, graphics, sound, music).

1. On your computer Open Adobe Premiere Pro in the Adobe Master Collection.
2. Click on New Project
3. The "New Project" Window will come up, in it type a name for your project, for this one name it "Practice" and make sure the location for you project is on your student drive. To do this, click on Browse and select your student drive.

TIP* Make sure your source files from your camera are in a folder on your student drive. NEVER change the location of these source files from your camera because Premiere uses pathways or links to the original footage - it does not actually ingest the footage from the source files.

PROJECT PANEL IDs
If a Panel is selected there will be an orange border around it. This activates that panel for you to work within it.  Here are the names for each panel:

IMPORT MEDIA
4. In the Project Panel (where it says Project "File Name" on the bottom left) right click and select Import. Then select your frame(s) and click open. The frame(s) will be inserted into your new project so you can work with them now. Choose 4 photos from your first Photography Portfolio or your Portraiture Portfolio.


5. Click and drag your frames into the Video 1 track in the Sequence Panel.  Your frames will now appear in the Sequence Panel. Drag them in one at a time and drop them in a line, one after the other.

7. Go to the toolbar at the top, click on Edit> select Preferences> select Autosave> Turn ON. Make the Autosave every 10 minutes. 

This is one of many ways to Import Media, here are some other shortcuts and ways to do the same thing:
a. Common - double click in Project Panel, this will open up the Import Box
b. Right click> Import
c. File> Import
d. Control "i"

Thursday, April 13, 2017

Introduction to Animation

INTRODUCTION TO ANIMATION 


VOCABULARY: The National Film Board of Canada (NFB) defines animation and stop-motion animation as follows: 

Animation: Frame-by-frame creation or capture of drawings, CGI models, puppets or objects, recording incremental changes in the subject. Played back at normal speed, the recorded manipulations create the illusion of movement and “give life to” what was previously static art.

Stop-motion animation: Creating the illusion of movement in a puppet by incremental “move and stop” frame-by-frame shooting. The recorded changes to the puppet’s poses “give life” to what was previously static art. This technique often uses clay or plasticine characters or puppets. Pixilation is a variation of stop-motion animation and is achieved by photographing the movement of humans one frame at a time. From: https://www.nfb.ca/playlist/stopmostudio/

Frame: one of many still images used in sequence to create animation

Think of Stop-Motion Animation like those flip-books you might have made as a kid:

So each page the character or object changes position a little bit so that when you flip through the book it becomes animated.

See an example of a student flip-book animation here: Sports Flip-Book

Stop-Motion Animation is quite similar, each frame is a photograph instead of a drawing on paper. The photos are then put together in sequence on a video editing program like Adobe Premiere Pro and played back to create animation. 

Remember in your History of Photography Web Hunt, the first motion picture presentation was in 1880 in San Francisco, California.  The photographer Eadweard Muybridge used sequential photographs of a horse galloping and projected them one after the other to make it animated, see the video here: Horse Galloping Eadweard Muybridge. This is the stop-motion process!

Today, Stop-Motion is still a very impressive filming technique, here is the trailer for Fantastic Mr. Fox from 2009: Fantastic Mr. Fox
Here is a list of Stop-Motion full-length films, many of which you may have seen!

Let's break it down.  Here's how to create a stop-motion film: https://www.youtube.com/watch?v=PHTQr0kfA98

You can use many objects to create a stop-motion film, here is one using clay: Video

Some student project examples: 

https://www.youtube.com/watch?v=lkqDG4zsHtk (using play-doh)
https://www.youtube.com/watch?v=clfhTsyEFjI (using action-figures)
https://www.youtube.com/watch?v=Xke-crWx_a4 (using drawings)
https://www.youtube.com/watch?v=AJEBbs9X6s4 (using cut paper)

Away today

Good afternoon! 

Sorry for being away today - I am with the DD class cooking and serving lunch at Friendship House. 

Please work through the Intro to Animation Post - We will be beginning this project next week.  You need to work in pairs for this assignment - so start thinking about that. 

Make sure you watch all the links posted! 

***Today is the LAST DAY for ALL TERM 1 ASSIGNMENTS! Double check that everything is posted to your BLOG! I will be power marking this weekend! Term 1 report card marks are due next week! 

Have a great long weekend - see you Monday! 


:) 

Monday, April 10, 2017

Assignment #10 - Balanced Composition

BALANCED COMPOSITION

 Creating a Balanced Composition 

Remember that photo you took of the "Rule of Thirds"? Where the subject was off center? That is a technique artists use to create a balanced composition. Today we will discuss balance as there are several types of balance.  

Terms to know:
Balance: the achievement of equilibrium among the various parts of an artwork
Composition: the organization or arrangement of the forms in a work of art

TYPES OF BALANCE 

  • SYMMETRICAL OR FORMAL BALANCE happens when one half mirrors the other; symmetrical
  • ASYMMETRICAL OR INFORMAL BALANCE happens when two different objects seem to have the same visual weight (via hues, values, intensities, shapes…); asymmetrical or using the rule of thirds
  • RADIAL BALANCE happens when elements or objects in an art work are positioned around a central point
Look at some of the following images to see examples of the three types of balance.

Your task: Create a blog post on balanced compositions. Find 2 images of each type of balance for a total of 6 images. You must have a theme for your blog post images, could be: dogs, cars, nature, love, purple... you pick! Each photo must be OBVIOUS what type of balance it is.  You will receive a Knowledge and Understanding mark  /6.


SYMMETRICAL OR FORMAL BALANCE EXAMPLES


ASYMMETRICAL OR INFORMAL BALANCE EXAMPLES


RADIAL BALANCE EXAMPLES


Wednesday, April 5, 2017

Unit 2 - Learning Goal - Portrait Art History

Answers to Art History Portrait Note 

PP Portrait Art History


Terms to Know 

Frontal 
3/4 View 
Profile 

Answers in Blue 

Date, Name, and Period of each Portrait 

Tuesday, April 4, 2017

Group A - Assignment #9 - Portraiture Portfolio

Portraiture Portfolio Project

What is a portrait?
-a painting, drawing or photograph of a person, can depict only the face or head and shoulders, full body

Step #1: Sign out a DSLR camera and get a partner.
Step #2: Make sure your camera is on MANUAL FOCUS
Step #3: Take 100 focused portraits of each other, which is 10 of each of the following:
                      -Basics: profile, frontal, 3/4
                      -Framing: close-up, shoulder length, mid-shot, full-shot
                      -Camera Angles: high angle, low angle, eye level
Step #4: Transfer and save your photographs to your student drive.
Step #5: Choose the best 10 of your 100 photographs = 1 of each type of portrait listed in Step #3 and pictured below. The 10 you choose should be the most dynamic and interesting of the 100. Choose a variety of facial expressions, those with a full range of values and those with balanced compositions. You will need to coach and direct your partner/model in order to get the photographs you want. To be a good partner/model for this project you must listen and take guidance from the photographer.


Criteria
Level 1
Level 2
Level 3
Level 4
Application
Quality of Photo:
-full value range
-in focus
-balanced composition

            /20
Limited quality: some value range, unfocused or little use of balance in the composition
10    11
Sometimes good quality: some value range, some focused photos, some balanced compositions
12    13
Good quality: most photos have a full value range, are focused and show a balanced composition
14   15
Awesome quality: All photos have a full value range, all are focused and have balanced compositions
16   18   20
Exploration and creativity:
-variety of facial expressions, shots, locations to create a dynamic and interesting portfolio    /20
Limited exploration and creativity: little variety of shots, facial expressions and locations.

10    11
Somewhat explored and creative: some variety in shots, facial expressions and locations.

12    13
Good exploration and creativity: good variety of shots, facial expressions and locations.

14   15
Huge
Exploration and creativity: lots of variety in shots, facial expressions and locations.

16   18   20
Thinking/ Inquiry
Types of Portrait shots achieved


                /10
Check the examples again.
Half accurately depict the type of portrait.
5     5.5
Check the examples again. 6/20 accurately depict the type of portrait.
6     6.5
Good stuff!
Most of the portraits accurately depict the type of portrait.
7     7.5
Nailed it! All 10 accurately depict the type of portrait.
8   9   10
Total                                                                                                                   /50


See examples of the 10 types of portraits from famous portrait photographers below:

BASIC
profile = side view


frontal = straight on


3/4 = head is turned at an angle


FRAMING
close-up


shoulder = shoulders and up


mid-shot = chest to hips and up

full-shot = full body


CAMERA ANGLES
high angle


low angle


eye level